1. Choose Files (the top left tab). Decide whether you want the program to process sub-folders of the one you choose. There is no limit to the number of files Text Converter can process in one operation.
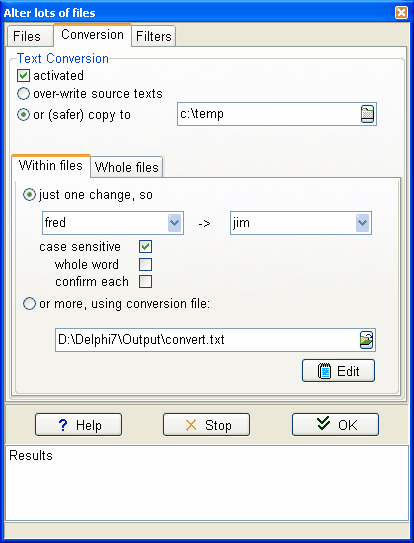
2. Click on the Conversion tab, and:
3. Decide whether you want to make copies of the text files, or to over-write the originals. Obviously you must be confident of the changes to choose to over-write; copying however may mean a problem of storage space.
4. Specify what to convert, that is the search-words and what you want them to be replaced with. For a quick conversion you can simply type in a word you want to change and its replacement (e.g. Just one change so that responsable becomes responsible) or you can choose your own pre-prepared Conversion File.
5. Or in the Whole Files section you can choose simply to update legacy files by choosing
Dos to Windows,
Unix to Windows,
MS Word .doc to .txt or
into Unicode.
6. If you might want some files not to be converted, or simply don't want any conversions but instead to place files in apprropriate sub-folders, choose the Filters tab.
If you choose Over-write Source texts, Text Converter will work more quickly and use less disk space, but of course you should be quite sure your conversion file codes are right before starting!
Note that some space on your hard disk will be used even if you plan to over-write. The conversion process does its work, then if all is well the original file is deleted, and the new version copied. There has to be enough room in the destination folder for the largest of your new files; it is much quicker for it to be on the same drive as the source texts. If it isn't, your permission will be asked to use the same drive.
Press OK to start; you will see a list of results, as in the screenshot below.
If you want to stop Text Converter at any time, click on the Cancel button or press Escape.

Right-click to see the source or the converted result file.
See also: Text Converter Contents.