to
Motorbike
See also : Route 66 trip
I recently fitted Oxford Hot Grips to my Suzuki Bandit GSF650S and as that was far more tricky than the manufacturers said, I thought I'd put a few tips.
Problems were two: actually forcing the new HotGrips onto the handlebars, and identifying a suitable way of doing the wiring.
Getting the new grips onto the bars
Clean off the old residue quite thoroughly. Use coarse sandpaper and a Stanley knife as necessary for that. Then if the new grips are extremely reluctant to slide up the newly-cleaned and sanded bars as mine were, take a whole sheet of coarse sandpaper and roll it up -- a whole sheet should make a nice snug fit inside the new grips, enabling you to sand these from the inside instead of trying to sand the metal from the bars...
Wiring
It's easy if you simply want the grips to be live all the time. The Oxford wiring loom is easy to understand and straightforward to fit to the battery terminals. But I didn't, because where I work or in town kids sometimes get at and then play with the controls on my bike; they might switch the button on and would see a nice little red light come on, and if it was left on I might easily return to a bike with a dead battery.
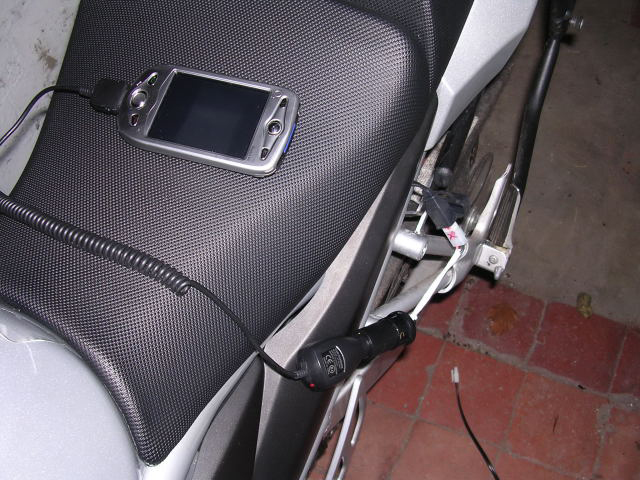
I also wanted to be able to connect a PDA or GPS and who knows what in future.
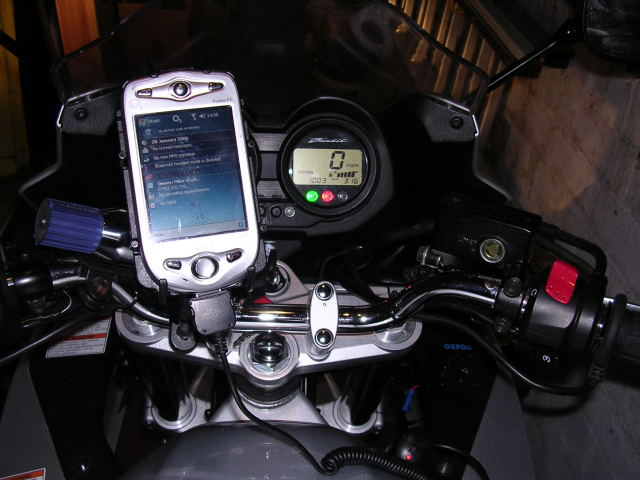
I wanted to fit an accessory wiring box in the fairing. You can't see it in this but it's below where you can faintly see Oxford at the right in blue, which is the top of the Oxford grip control with on/off and variable temperature controls.
The Oxford document is pretty hopeless about installation if you want your wiring to be switched along with the ignition. They recommend you contact your local dealer -- and the one I tried basically refused to tell me over the phone because the mechanic said he could be sued if it led to subsequent problems. All he would say was to access a wire near the fusebox, and that it would be red. There are loads of wires there and I couldn't find a likely candidate on my Suzuki.
Luckily I found a great tip (from http://www.canyonchasers.net/shop/generic/relay.php) about how to set up an array of terminals for powering anything (eg. GPS, heated clothing, hot grips), which becomes live only if the ignition is on. I followed their advice and so far so good.
Finally, avoid some of my mistakes; when I repositioned the petrol tank I had the main fuel tube strangled. It's best to do this job à deux in a decent lit garage, not in a 4 foot wide side passage, and in October, not in January.
Here's how I did the wiring.
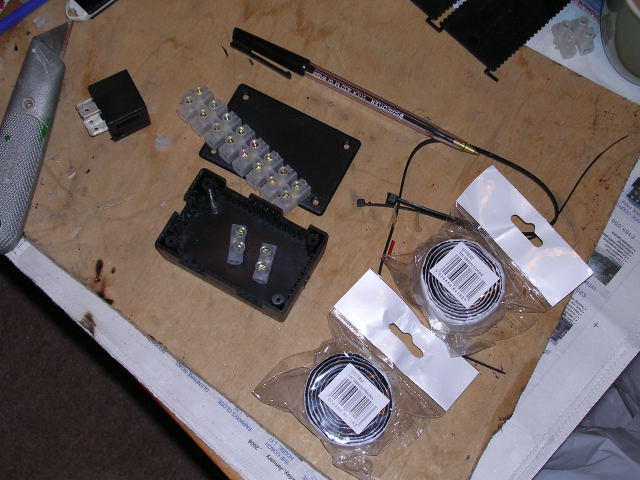
Parts from Maplin
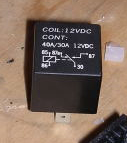
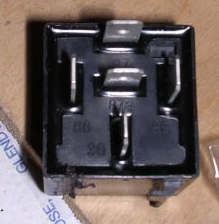
N00AW auto relay
L98AR terminal block
BZ72 ABS box
UV83 adhesive velcro loops and UV18 adhesive velcro hooks
N70BZ Plastic Weld glueOther kit
assorted 24 gauge wire and electrical connectors
tools used: screwdrivers, soldering iron, fretsaw, Stanley knife, multimeter to check contactsThe details
parts (I cut out holes in the black plastic box and this is explained below. The rolls are the adhesive Velcro.
The auto relay has this on top
and these pin numbers below, which match the pins described by canyonchasers well. I didn't use 87B in the centre and dunno what it's for.
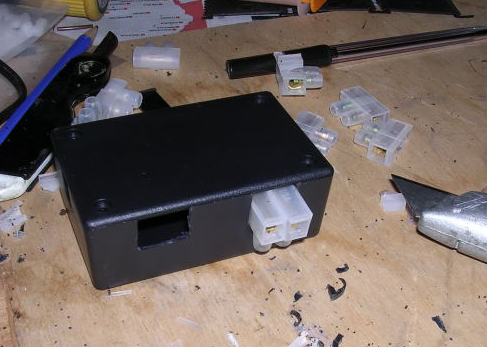
Next stage was to cut holes in the plastic box -- I used a fretsaw but the Stanley knife in the picture would have managed it.
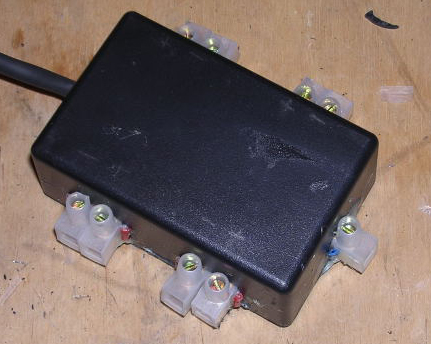
I decided to put 4 pairs of positive & negative terminals at the sides of the box and to connect the top end to the sidelight, leaving the other end for the main wire from the battery.
as I recall this is the wiring where red=positive and purple negative
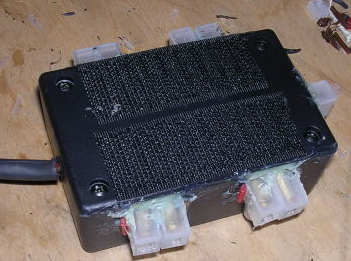
And I used the Plastic Weld to glue the relay inside -- it fitted perfectly so that was probably unnecessary -- and to seal the cuts around the terminal contacts. The Velcro is to be able to secure the finished box within the fairing at the front of the bike.
The top looked like this with bits of coloured wire glued to indicate positive and negative. The blue one goes to the sidelight, which is always on when the key is switched; I tapped into a green wire there, probably the positive -- the other going to the sidelight was black & white.
Once in place with a further velcro strap to be sure it stays put over bumps, it's like this:

LATER SAFETY COMMENT -- the Velcro does work if there's plenty of it but
I cannot claim this is necessarily safe for every use
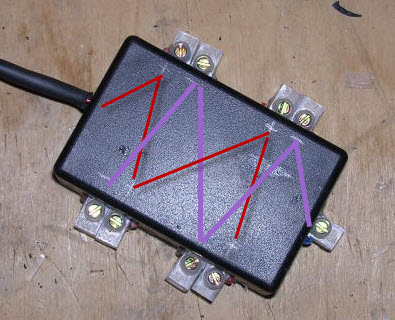
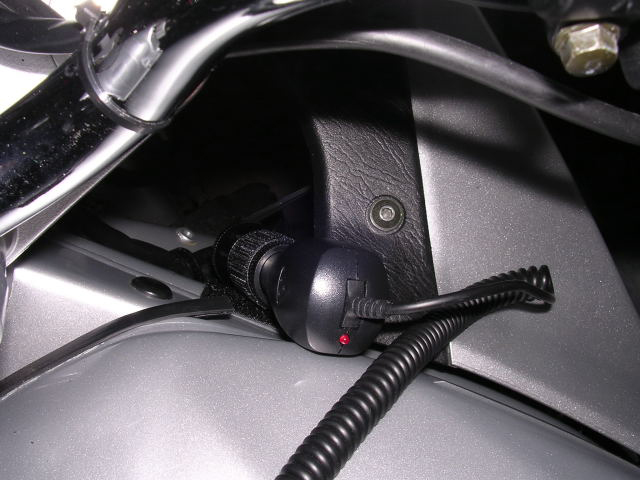
Not elegant but it works OK. The bottom 2 pairs of contacts are spare. The top 2 have HotGrips (fused) and an inline cigar lighter socket (99p). At Maplin you can get a cigar lighter socket with lid but it's £7.99 I think and anyway I didn't want kids putting stuff in there, so I put the inline connector out of the way with velcro when not needed and attach it to the side of the tank when it is.
Finally, so as to be able to connect a PDA, or a water heater or radio without necessarily wanting it to be switched with the ignition, I connected another inline cigar lighter socket to a connector to link where my Datatool battery charger connects up near the seat.